 |
headus 3D tools / 3D scans
Support Forums
|
 |
| View previous topic :: View next topic |
| Author |
Message |
highlander_72
Posts: 41
Joined: 23 May 2007
|
 Posted: Sat May 26, 2007 12:38 am Post subject: Unwrap Workflow Posted: Sat May 26, 2007 12:38 am Post subject: Unwrap Workflow |
 |
|
Could someone quickly describe the workflow (keyshortcuts and all) to efficiently unwrap ie a human head or point me towards the appropratie tutorial or video?!
I am really new at this and for some reason I cant seem to get decent head unwrap. For example, I cut the head off of a body and up from the rear but the head merely comes off of the main body leavin the cut from the back of the neck towards the forehead welded and so it wont unwrap. Do I have to cut it in half and then weld it to get one solid head UV layout?
Also, would someone be willing to share an image of a next to perfectly optimized, unwrapped head mesh with the color coding to show distortion?
Thanks a lot in advance!  |
|
| Back to top |
|
 |
moochie
Posts: 105
Joined: 13 Jul 2006
|
| Posted: Sat May 26, 2007 1:23 am Post subject: |
|
|
Hi. Actually, there's something we need to know first. How are you going to texture the model and how is the model going to be used?
If you'll be painting in ZBrush or Bodypaint, or another prog that allows you to paint over seams on a live model, then one can put more splits in the mesh and get a much better flattened piece. However, if you'll be overlaying a photo on your template, and so you want the map to be as head-shaped as possible, then there are different considerations.
As for use .. will the model be used in a one-off render, or does the texture need to be as good as possible all the way round? If it's just for a one-off, then you only need to concentrate on flattening the area that will appear in the final render.
Although there are certain 'rules' about getting an optimum map from a head mesh, I've found it does vary depending on the topology of the particular head.
On the specific question about splitting the mesh, once you've separated the head from the body and you have a split up the back of the head, just hit Shift+S to create the split, then drop the shell into the UV window (hot key D).
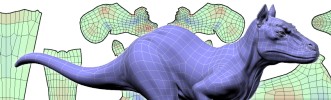
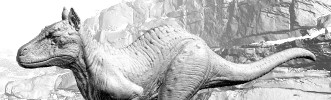
Incidentally, have you checked out the Examples forum? I posted a thread called 'Almost Impossible', which contains the map for an entire body. Although the map doesn't show the colour coded distortion, I did do some renders with the texture template used as the texture map. Any distortion would show up as blurred or wonky lines. There aren't any. The head has a split from the corner of one eye to the top of the ear on the same side, there's a split around the nose and the mouth, and bits that won't be seen have been separated off and flattened separately. |
|
| Back to top |
|
|
highlander_72
Posts: 41
Joined: 23 May 2007
|
| Posted: Sat May 26, 2007 8:08 am Post subject: |
|
|
Hello,
and thanks a lot for the very detailed answers, moochie.
My questions are more relevant, ideally for next-to or photo-realistic character animation (ultimately in XSI) not necessarily with image-projected textures, rather than just a single render. So ideally, I need a uv-layout that doesnt cause any distortion, "swimming textures and the like from pretty much any angle. That will be especially important around the mouth and eye areas, since I will animate a lot of talking and mimicry. Think of it as if I am trying to create a virtual actor.
I use Zbrush for normal/displacement maps and have Bodypaint within C4D, so could/can/will paint in there and can thus handle the seam issue on a 100% painted texture.
I will however frequently use photo reference for displacement in ZBrush and am not sure how such a really cut up uv map may affect the results, but am guessing they wont very much, as ZBrush is using the completely unreadable tiles and they appear to work one way or another if the uv's are mapped completely in Z.
I was already thinking about ie completely disconnecting the ears, cutting them up neatly and leaving them separate to get rid of this high distortion area and in combo with BP your suggestions seem to confirm that could be the right direction, but correct me if I am wrong.
I will check out your thread and pictures as soon as I am done typing this.
Thanks lot again!
PS: From the first impressions I have, this is a great little program. I used to really hate uv layout work and avoided it at every turn, but it is so important and this program make it looks as if it could really be fun actually. |
|
| Back to top |
|
|
headus
Site Admin

Posts: 2894
Joined: 24 Mar 2005
Location: Perth, Australia
|
| Posted: Sun May 27, 2007 5:56 pm Post subject: |
|
|
There's a flattened out head that you can download from here ...
http://www.headus.com/phpbb/viewtopic.php?t=55
Actually, thats a fairly old file now, created before I wrote the webbing tools. I'll upload an updated version sometime today.
Phil |
|
| Back to top |
|
|
highlander_72
Posts: 41
Joined: 23 May 2007
|
| Posted: Sun May 27, 2007 9:51 pm Post subject: |
|
|
Thanks a lot, Phil!
I'll check back later for the updated file. In the meantime, I'll look at the ones I could download already.
As an experience value of your own, how much distortion is acceptable in Uvlayout for ie. a cinematic digital double?
Being a perfectionist, I tend to overdo it and would probably cut the whole mesh up until I have next to zero distortion and paint it almost exclusively in a 3D paint app.
Since I work in a micro-crew environment, I would of course like and need to avoid every inch of unnecessary work, so help and input here are really appreciated. (side note: my base meshes are rather dense, similar to the one moochie showed off in his thread)
Cheers,
Felix Lahme
PS: It might interest you that you are only a small stretch away from gaining a new paying customer. I am very impressed with Uvlayout so far and do favor it over other apps such as Unfold at this time. |
|
| Back to top |
|
|
headus
Site Admin
Posts: 2894
Joined: 24 Mar 2005
Location: Perth, Australia
|
| Posted: Sun May 27, 2007 10:44 pm Post subject: |
|
|
First off I should say I'm a programmer, not a modeling/shading TD, and the limited experience I do have is pretty much restricted to film rez rendering of displacement mapped subdivision surfaces.
From that perspective, a bit of distortion is better than zero distortion with lots of seams. Particularly if you're using prman's smooth UVs, seams all over the place will give you lots of grief.
The critical thing I've found is to have an even flow of UVs, and in UVLayout that will show up as a gradual change from red to green to blue shaded polys. If you have a sudden change from compressed (blue) to stretched (red) UVs, you'll get artifacts in the rendered displacement maps at the internal poly edges ... they're subtle, but some people notice things!
Phil |
|
| Back to top |
|
|
highlander_72
Posts: 41
Joined: 23 May 2007
|
| Posted: Sun May 27, 2007 11:58 pm Post subject: |
|
|
Thanks, Phil.
That's more than enough qualified and appropriate advice. Even though I wont be using renderman, but LW's internal renderer and Mental Ray, i guess your advice regarding the number of seams and their effects on displacement at film resolutions still holds true on that end as well regardless of the actual renderer used.
I guess it doesnt really make things any easier, but makes the direction to take all the more clear and removes some confusion on my end. Thanks a lot again.
How, as a general rule of thumb, does the actual poly/sub-d topolgy have an effect on really clean poly-flattening in uvlayout?
Forgive me if that is a dumb or uneducated question, but from what little I have seen myself in layout so far, some things, regardless of apparent complexity, seem to flatten out faster and more easily, but I havent been observing enough to really detect the pattern behind it.
I am merely assuming that a clean and animation-friendly topology goes a long way here as well, while on the other extreme end, highly convoluted/complex objects or a typical messed-up Zsphere-sculpt would really cause some issues?
Instead of of spending more time on just staring at the process and trying to figure it out myself, I thought I'd just ask like a 4 year old! 
Thank you very much for your time an effort, Phil!
Cheers,
Felix |
|
| Back to top |
|
|
headus
Site Admin
Posts: 2894
Joined: 24 Mar 2005
Location: Perth, Australia
|
| Posted: Mon May 28, 2007 2:09 am Post subject: |
|
|
How ... does the actual poly/sub-d topolgy have an effect on really clean poly-flattening in uvlayout?
The flatter the mesh, the easier it is to flatten out :-) Other rules/hints would be:
A quad mesh will flatten out better/faster than the same geometry as triangles.
It can be faster to flatten smaller pieces and weld them together for a final optimize, rather than trying to flatten it all in one piece from the start.
Use the H hotkey to hide the bits you aren't working on. Redraws will be faster especially if you're working on those denser meshes.
If your dense mesh is actually a lower resolution mesh thats been subdivided, load the lorez mesh into UVLayout and flatten it out first, then subdivide, then load the dense mesh for a final optimize.
Phil |
|
| Back to top |
|
|
highlander_72
Posts: 41
Joined: 23 May 2007
|
| Posted: Mon May 28, 2007 10:47 pm Post subject: |
|
|
Thanks a lot again for all that info, Phil.
You have to understand that I am the typical math-idiot artist, who will look at something or a concept that is apparently simple for a programmer such as yourself to understand and can make as much sense of it as if looking at chinese writing. Well, chinese actually makes more sense to me than math and everything related. lol
So please forgive any seemingly dumb questions in the future as well, which most definitely will come!
Anyways, after more playing around with the program, I am slowly coming to grips with it and am actually enjoying the uv layout process.
I'm sold, so expect my first order later today!
Felix |
|
| Back to top |
|
|
|
|
You cannot post new topics in this forum
You cannot reply to topics in this forum
You cannot edit your posts in this forum
You cannot delete your posts in this forum
You cannot vote in polls in this forum
You cannot attach files in this forum
You cannot download files in this forum
|
Powered by phpBB © 2001, 2005 phpBB Group
|

